Showing posts with label Cricut. Show all posts

Monday, November 7, 2016

Christmas Lights Layout

Every year, my town has a beautiful Christmas lights display on the square. My son absolutely loves walking through the light tunnels. Last year, the colors were perfect for an old Doodle Bug paper pack I had in my stash. The Doodle Bug paper pack is called Winter Friends, and I have no idea how old it is. I bought it a few years ago, but I believe it was already retired at that point.


So, for this layout, I used the Cricut Create a Critter 2 cartridge to cut out these adorable penguins, polar bear.


For the both pages, I also added a fun light string stamped design using a retired Close to My Heart Stamp of the Month. Unfortunately, not as much ended up showing as I had originally intended.


This little twinkle was from the same stamp set.


Finally, I added some funky Christmas trees from the Cozy Christmas Thin Cuts Bundle. This is a stamp set that comes with the Thin Cuts! The sentiment is also from this stamp set. And, the Enamel and Glitter Duos Blue Dots also matched this paper pack perfectly!


I am entering this layout in the Heart 2 Heart Holiday Challenge, which asks for holiday designs without red or green!

Close to My Heart Ingredients:
  • Glitter Duos Blue Dots
  • Cozy Christmas Thin Cuts Bundle
  • White Daisy Cardstock
  • Black Cardstock
  • Slate Cardstock
  • Peacock Ink Pad
Happy Scrapping, My Artsy Friends!

Friday, July 22, 2016

A Kiddie Halloween

One of my absolute favorite yearly events to scrapbook is Halloween. I think part of it is that I love the colors associated with it, but it's also because we have so much fun as a family celebrating Halloween. Last year, my oldest son and I attended a Halloween party for our Early Childhood PTA. Let me tell you how adorable it is to have a costume party with toddlers. For Halloween, my son was a rocket ship and I was the Moon. I made both of our costume, and you can view them better here. For this two page layout, I mixed two retired CTMH Halloween paper packs, Scaredy Cat and Nevermore.


For the left page, I used a spiderweb cut from the Artbooking and some fussy cut stamps from the retired Little Monsters stamp set to embellish. 


I actually had this spiderweb left over from another project, so this worked as a stash buster for me, as well. I never throw out extra cuts, because I can usually find another project for them!


The thing I loved about this stamp set was that the monsters look like kids, which was perfect for this design. I hand colored the images using blending markers. 


For the right page, I cut the title from the Mini Monsters Cricut Cartridge. I think this cartridge maybe retired, which is a shame, because it's really awesome!


Here again, I mixed embellishments from the two retired paper packs.


Ingredients: Unfortunately, all of these products are retired, but you can view all current products here.

Happy Scrapping, My Artsy Friends!

Saturday, April 23, 2016

Two Simple Cards Using Paper Fundamentals

This week, my husband graduated college and had a birthday! Since these were both perfect card giving opportunities, I got crafty! I wanted to make adorable cards on the quick, so I decided to use the Paper Fundamentals for both cards. I really love Paper Fundamentals, because they can easily accent any paper pack, work together for a fun design, or stand alone.


For the first card, I used an old Paper Fundamentals sheet in Smokey Plumb (retired). I used a Spellbinders die to cut and emboss the circle, which I stamped with stars and a sentiment. The owl is cut from Cricut Create a Critter 2. I chose this color scheme, because they are the colors of Grand Canyon University, where my husband graduated. I am entering this card in Heart 2 Heart's "Four" Challenge, since college takes four years.


For his birthday card, I used Adventure Paper Fundamentals Honey Cardstock. Yellow is my husband's favorite color. I again used a Spellbinders die to cut and emboss a circle. The stamps and sentiment here are a die and stamp set from Lawn Fawn

Ingredients: 
Happy Scrapping, My Artsy Friends!

Monday, February 8, 2016

Vintage Car Birthday Spread

Hello readers! Sorry I have been MIA for the past month. There are big changes in my artsy household, including a soon to be baby! I am 20 weeks pregnant now! This pregnancy has been great, but exhausting, which has left little craft time. But, I am getting back into the game now! In fact, I went to a crop over the weekend and made lots of fun layouts, including this one!

For my husband's birthday last year, my son and I took him to a vintage car museum in Cleveland. The retired Jackson paper pack is intended to showcase outdoor adventures, but the vintage feel was perfect for our trip to the museum.


For the left page, I used some of the Jackson compliments to accent the page. I also created this vintage looking car using the Beep Beep Cricut cartridge.


For the right page, I created another vintage car using Beep Beep, and created a title using the retired Wilderness My Crush set, which matches the Jackson paper pack perfectly!


Happy Scrapping, My Artsy Friends!!!

Saturday, October 17, 2015

Happy Halloween Witching Card

Welcome back, readers! Today, I am going to show you a Halloween card I made based on this sketch from Heart 2 Heart Challenges.


I decided to create a Halloween card, because I've actually never made one. I used my Cricut Artbooking cartridge, and here is what I came up with.


For the inside, of the card, I layered white cardstock, because the base was black. Then I added a witch's cauldron from the Cricut Mini Monsters cartridge and some more shimmer trim. I left the rest blank, but a sentiment could be added.


I also entered this card for Color My Heart's Color Dare #164.


 Ingredients:
Happy Scrapping, My Artsy Friends!

Sunday, August 30, 2015

Teacher Life: School Spirit

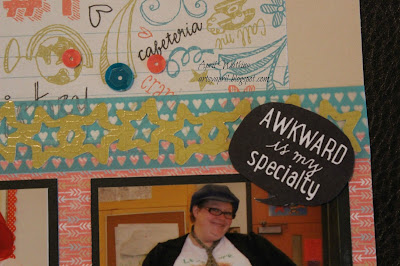
Hello there, Scrappers! Today I am going to show you how truly dorky I can be. I was a high school journalism teacher for six (VERY LONG) years. During that time, I worked at three different schools (#militarywifelife). My absolute favorite school was East Bay High School in Gibsonton, Florida. The kids had amazing school spirit, and I loved being part of it. So, for Spirit Week 2009, I decided to play along.


For this layout, I used the Chalk It Up Paper Pack (retiring tomorrow!) to give the pages a real old school, academic feel. On the left page, I used some stamping accents from the Geek Is Chic stamp set to accent my true adorkability.


I also used the Chalk It Up chipboard complements, because I had some left.


For the right page, I wanted to highlight one picture, which was of me dressed for the Homecoming Dance, so I made it a full 4x6, instead of the 3.5x5.


To accent this page, I added this fun star border cut from Artbooking using the Free to Be Me (retired) paper pack. You'll also notice that all of the photos have been stamped with the coordinating day of the week. I used White Daisy pigment ink to create this look.


I am entering this layout in this week's Heart 2 Heart Challenge: Working 9 to 5.

Ingredients:
  • Chalk It Up
  • Chalk It Up Complements
  • Geek Is Chic
  • Artbooking
  • Black Ink
  • Lagoon Ink
  • White Daisy Ink
  • Coral Sequins
Happy Scrapping, My Artsy Friends!

Wednesday, August 19, 2015

Cars, Trucks, Boy's Life

Hello again, scrappers! I am a little behind in my posting, because I was attending my upline's mini convention over the weekend. I learned so much about the new catalogs that I cannot wait to share it with all of you in a few short weeks! I am still booking parties for the fall, but I am filling up fast, so if you are interested in earning some awesome hostess rewards please contact me ASAP.


Onto the fun stuff... Last week, the Heart 2 Heart Challenge was Ticket to Ride. Since, H2H gives participants the entire month to complete tasks, I am posting mine today!


I decided to create a layout showcasing my son's awesome playroom that my husband and I created for his 2nd birthday. My son is a busy boy who absolutely loves cars and trucks.


So, for this layout I used CTMH Honey and Cranberry cardstock and Topiary ink, but the bulk of the layout was made using Bo Bunny's On the Go paper pack and accessories. This paper pack had the feel we were going for in the playroom.


To embellish, I used some of the coordinating accessories, a Rub-on from Hobby Lobby, and a stencil from Heidi Swapp. I put it all together using a layout from the Make It From the Heart Vol. 1. This layout is a fun design perfect for this topic!

Ingredients:
Happy Scrapping, My Artsy Friends!


Tuesday, August 4, 2015

Bumble Bee Birthday Card

Hello again! My best friend has a birthday this week. To celebrate, I sent her this bumble bee birthday card.


I created the card with a monochromatic feel using Smoothie cardstock and ink. The embossing folder is Cuttlebug's Honeycomb. The stamped honecombs were cut using the Artbooking cartridge. And, the sentiment and bee are from the Happy Everything Operation Smile stamp set, which retires this month. I used a little bling to show the bee's path. 


I forgot to take a picture of the inside before I wrote on it, so I apologize for the poor picture quality here. I stamped some more honeycombs in the bottom right corner with the sentiment, also from the Happy Everything stamp set.


Ingredients: 
Happy Scrapping, My Artsy Friends!

Monday, July 13, 2015

Life's a Beach

This week's Heart 2 Heart Challenge is Life is a Beach. I used this as an opportunity to scrapbook our trip to Clearwater Beach last year.


I absolutely love the Seaside WOTG. I will really miss this set when it retires next month! 


I used some cuts from the Life's a Beach Cricut cartridge to create waves and the brown border.


I also used the Seaside Picture My Life cards to embellish the page. And, yes, those are real seashells from the beach.


I added an extra layer to the page by using a background stamp that is included with the WOTG. 


On the right page, I continued the same Cricut cuts to balance the pages.


To add dimension to the page, I cut up a PML card and added foam tape behind certain parts. (Thanks to my friend Adrienne for letting me scraplift this!)


I also made this little beach sign that I added hemp string to, so that it looks like you could hang it.

Ingredients:

Happy Scrapping, My Artsy Friends!

Monday, June 8, 2015

June H2H Guest Designer: Around the World- Maps

Hello there, Artsy Friends! I am truly honored to be Heart 2 Heart Challenges Guest Designer for the month of June 2015! Heart 2 Heart is a challenge blog for projects that feature Close to My Heart products. A new project is posted every Monday, and you have the rest of the month to complete the projects.

The second H2H challenge this month is Around the World: Maps. I drew from Pinterest for this layout. All of my Pinspirations can be found on my Scrapbook Page Idea Board.


The Wanderful paper pack is perfect for travel layouts. Fortunately, I had a few scraps left from my paper pack. For starters, I used the zip ties and washi tape to create the flight pattern of the planes.


Since we were flying from Tampa home to Cleveland, I used my 50 States Cricut cartridge to cut out the states, and then drew a dotted "travel" line to mark our flight.


Instead of including the journaling from the original design, I chose to create a cluster embellishment using some items from my stash and the coordinating assortment and complements. I also used a Heidi Swapp stencil for the stars.


Ingredients:
Happy Scrapping, My Artsy Friends!

Sunday, May 24, 2015

Adorable Baby Girl Card

I was asked by a coworker of mine to make a card for her friend who is having a baby girl. The specifications were "super girly". I made a typical size card with pops of pink!


I used Hollyhock to mat the white background, which I embossed using the CTMH Hearts embossing folder. I also added Stickles dots to give a pop of color.


For the clothesline, I used the Baby Steps Cricut cartridge. There were a lot of tiny pieces to cut, but I think it paid off in the end.

Ingredients:
Happy Scrapping, My Artsy Friends!

Wednesday, May 13, 2015

Game On: Bowling Party

Hello again! This week's Heart 2 Heart Challenge is Game On! For this challenge, I decided to scrapbook my brother's 21st birthday party, which was at a bowling alley. The pictures from the evening were quite dark, because bowling alleys are dark in general. So, I tried to balance the dark photos with bright paper that matched the colors of our balls. I used the retired Year Noted paper pack, and a big mix of stamps.


I created my own B&T using the Confetti Wishes Workshop on the Go stamp set. I was trying to mimic the bowling balls again. The original sketch for this layout was from Make It From the Heart Vol. 1, but I have made a significant number of changes, so really only the sizes of the photos are the same.


For the left page, I added three different embellishment sections to balance the negative space of the design. For the first spot, I cut a shoe from the Boys Will Be Boys Cricut cartridge using the same paper pack. And, I used a Heidi Swapp stencil to create the bubble pattern.


For the next one, I used the Documenting Moments stamp set to create a short journaling space.


And, of course, I had to have a banner in the corner. I am seriously obsessed with banners!


For the right page, I mirrored the left page, and added a photo column of 3x3 photos.


I created another cluster embellishment using a retired Hopscotch PML card, another shoe, and the Mini Calendar stamp. And, notice the chevron punch used on both pages. Love it!


The end result was a whimsical spread that captures the night well.

Ingredients:

Happy Scrapping, My Artsy Friends!