Saturday, February 28, 2015

Make your own Shiny Paper: Halloween Spiderweb

Hello there Artsy Friends! So, I realize that it is the last day of February and we are buried in snow, but I'm going to transport us back to the last day of October for a moment. Halloween is one of my favorite things to scrapbook, because there is so much room for creativity and busy layouts. Undoubtedly, I end up with two or three spreads celebrating the holiday. This year, I have three. (Okay, technically only two of them are completed as I blog this, but still.)

For my first layout, I did a spread on our church's Trunk or Treat event. My family is all about the theme costumes. To quote my husband, "What's the point in having kids, if you can't have a family costume." This year, we went back to my husband's roots and dressed as pirates. My husband even built this really cool boat out of an old Power Wheels set!  The end result was a fun, exciting page using the Scaredy Cat Paper Pack and the magic of Artbooking.


The layout was inspired by the Confetti Wishes Workshop on the Go design. I added my own spin by adding the Artbooking overlays. For the left page, I used the full spiderweb overlay, and layered the other elements on top.


The haunted house icon is also from Artbooking. I added some Scaredy Cat paper in some of the window cutouts to add another element to the icon.


For the page title, I used the Mini Monsters and Robots Cricut cartridges. I used Cricut Craftroom to create a title mixing the two cartridges. The adorable washi tape is from Target. I bought it in their after Halloween clearance section. I believe it is Scotch brand.


For the right page, I used the corner spider web overlay as my base.


For the spiderweb border, I added a fun element to the black cardstock. Basically, when I first put it together, it looked so bland and flat. So, I came up with an idea. I took my VersaMark ink pad, and wet the paper directly with it. Then, I added clear embossing powder to the paper, and used my craft heater, just like I would to emboss a stamp. The end result was this awesome shiny paper! Notice how in the top of the image is catches the light? That's the embossing!


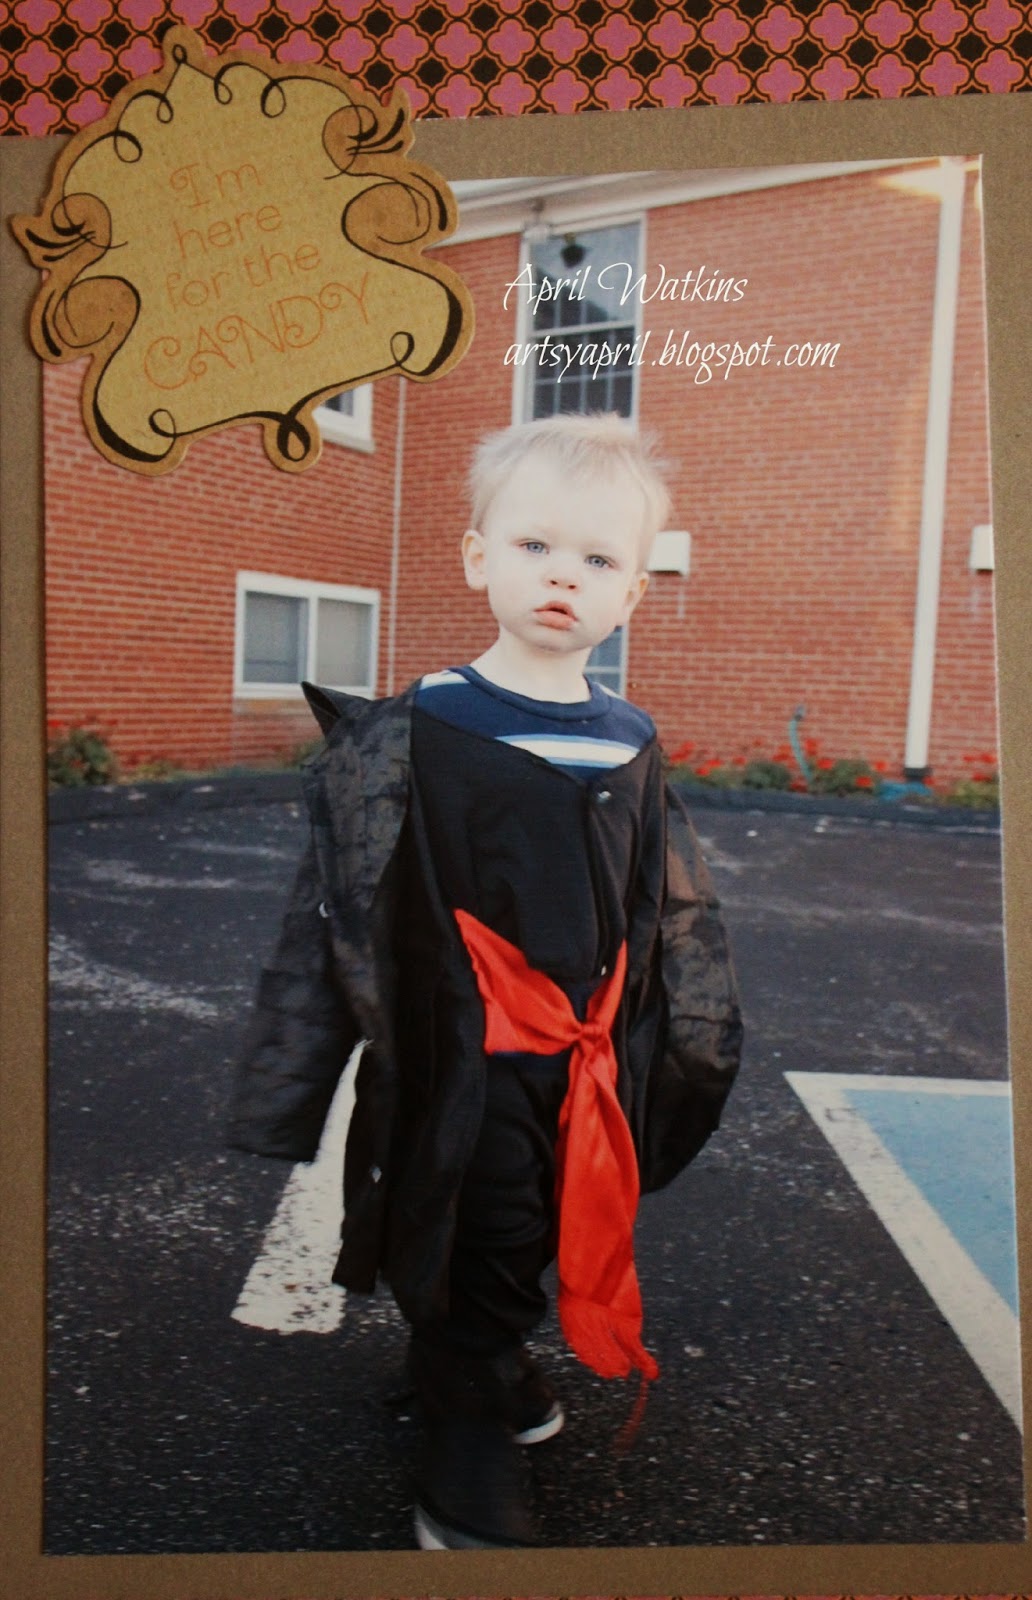
Last, but not least I leave you with this picture of my adorable son who won a prize for the "cutest" costume. He's kind of a favorite at our church. ;)


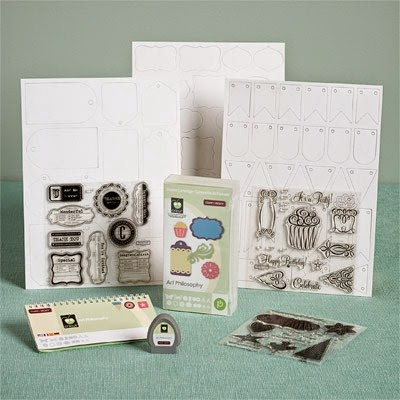
Ingredients (click the photo to order your own):


Happy Scrapping, My Artsy Friends!

Thursday, February 26, 2015

Join My Team in March!

Hello Scrappers! I have an exciting opportunity to tell you about today! March is our recruitment special. When you purchase a New Consultant Kit for $99, you'll receive a FREE shoulder tote. If you reach $300 in sales in your first 40 days, you'll also receive the rolling tote FREE!!! This awesome opportunity is available while supplies last, so be sure to sign up early! For more information, email me at watkinsaprilm@yahoo.com, or visit my website aprilwatkins.ctmh.com.


Happy Scrapping, My Artsy Friends!

Monday, February 23, 2015

Z Fold Cards: A Very Pink Birthday

This week's Heart 2 Heart Challenge is to Think Pink. This was the perfect challenge to inspire me to create a birthday card for my pink loving mom.

I'm a big fan of fancy fold cards, so I decided to try a new technique for this card. The z-fold card is named after the shape it resembles. I did a quick search on YouTube to find an easy to follow video. Unfortunately, I didn't find much. The video I did use can be found at the bottom of this post.

So, for my z-fold, I used the Brushed paper pack, which just so happens to celebrate girly flowers and lots of pink.


For the front of the card, I used the retired mini balloons stamp set and a Budding Friendship. I lined the edges of the card with the Topiary Striped Washi Tape. And, I gave the card some dimension with these adorable bow puffies from the Stuck on You Puffies set. This set is retiring the  end of March, and I will be so sad to see it go! I also added a little bow, paper clip to hold the card together.


For the inside, I used a stamp from the Joyful Birthdays set to stamp the Happy Birthday sentiment. I also used one of the Picture My Life cards from the Hopscotch set. I just loved the Dr. Seuss quote! I love using PML cards for more than just pocket scrapbooking. And, now you can purchase them without the page protectors at a lower price! 


For more information on Heart 2 Heart Challenges click here.

This card was also submitted for Close to My Heart's Blog Creative Challenge, which was to use Picture My Life Cards. #jrlcreativechallenge.

Here is the YouTube video I watched. If you find something better, please let me know in the comments. 


Ingredients:


Happy Scrapping, My Artsy Friends.

Friday, February 20, 2015

Fun, Girly Layers

Hello again, Scrappers! In October 2014, my newest niece was born! Since I have a son, I don't get the opportunity to create super girly pages very often. I have seized this opportunity to create a fun, girly page using the retired Chantilly paper pack.

My first step was to grab my Cricut Artbooking cartridge. There are some really adorable baby girl designs that I took advantage of using in this spread. But, I didn't stop there. I grabbed my Cricut Art Philosophy cartridge to create some fun banners, as well. The icing on this page was using Baker's Twine to tie some adorable bows. (Which fits perfectly with this week's Heart 2 Heart Challenge: enTWINED.)


For the left page, I used a 4x6 photo to build the page around.


I used the Baker's Twine and a button to wrap around two of the layers. Then, I used the All the Details stamp set for the "Hello, My Name Is embellishment.


All the Details also has these adorable banner stamps, which are compatible with the Cricut Art Philosophy cartridge. 


For the right page, I wanted to continue the layered look from the left, and I absolutely love this frame from Cricut Artbooking.


I embellished with this "hey there, cupcake!" banner, to which I added more twine and a bow from a retired paper pack.


The tree limb and page title were cut from Artbooking. But, I wasn't crazy about the owl I cut, so I used a Picture My Life card from the Babycakes set. I trimmed it down and added another bow.


For more information about Heart 2 Heart Challenges, click here.


Ingredients: 


Happy Scrapping, My Artsy Friends!

Monday, February 16, 2015

Black and White with a Touch of Blue: Engagement Card

On Valentines' Day, my brother got engaged to his loving girlfriend. To celebrate the occasion, I made them a congratulations card. I wanted to create a very understated card that had a touch of elegance. So, I chose to create an entirely black and white card with the simplest touch of something blue.


I used a White Daisy card base with a Black mat. Then I cut two pieces of White Daisy cardstock measuring 3.75x3in and 3.75x2in. I embossed these pieces using my Cuddlebug. The top piece is embossed using the CTMH heart embossing folder. The bottom piece uses a Cuddlebug folder from the Decorative Tile Set. The blue cardstock is a retired CTMH color.


I stamped the Blooming Heart mini stamp using Black pigment ink first. Then I used clear embossing powder to heat emboss it. This created a nice thick guide and barrier when I colored the flowers in the light blue color. Notice that I left all of the leaves white, because I did not want to add another color to the card, but I still wanted to differentiate them from the flowers in the design. I also added two little black flourishes around the image.


For the bottom panel, I dug through my stash of lace trim, leftover from my wedding scrapbook. The trim is from Hobby Lobby about four years ago, and is glued down using CTMH Liquid Glass.


For the inside of the card, I wanted to add a sentiment, since the front of the card doesn't have one. So, I used the Happy Couple stamp set to stamp a simple Congratulations in Black.

Ingredients: White Daisy Cardstock (1385), Black Cardstock (1386), Heart Embossing Folder (Z3018), Blooming Heart (M1049), The Happy Couple (D1539), Sparkles Black Flourishes- Small (Z1916), Basics Mini Pigment Assortment (Z2503), Black Ink (Z2105), Clear Embossing Powder (Z2088), Craft Heater (Z555), Liquid Glass (Z679)

Happy Scrapping, My Artsy Friends!

Wednesday, February 11, 2015

Teabag Fold Flower Card

I am in a monthly card swap with some of my awesome Heart Sisters. This month, we were tasked with creating cards using the teabag fold technique. The technique requires a lot of folding that looks complicated, but I actually found to be relaxing. I used the teabag fold to create a pinwheel flower using the Hopscotch Paper Pack.


I also took this card as an opportunity to showcase some of my favorite CTMH products, which just happens to be this week's Heart 2 Heart Challenge. My current favorite paper pack from the Seasonal Expressions catalog is the Hopscotch Paper Pack. It worked perfectly for this pinwheel flower. The background is in Indian Corn Blue and dry embossed with a new CTMH embossing folder. 


My true CTMH love is our line of Cricut cartridges. I use Art Philosophy and Artbooking for pretty much every piece of artwork I complete. They are incredibly versatile and create great accents! Plus, they both double as a font!!! For this card, I used Artbooking to create the spring, fence design, and I used Art Philosophy to create the flower where I put the sentiment. I stamped the flower with a sentiment from the Budding Friendship stamp set.


If you would like to make your own teabag pinwheel, I recommend this video. My pieces were cut to 2x2. 


If you would like more information on Heart 2 Heart Challenges click here.

Ingredients: Hopscotch Paper Pack (X7194B), Indian Corn Blue Cardstock (1284), Ponderosa Pine Cardstock (1276) Colonial White Cardstock (1388), Heart Embossing Folder (Z3018), Ponderosa Pine Ink (Z2145), Smoothie Ink (Z2196), A Budding Friendship (D1602), Silver Shimmer Trim (Z1799)

Happy Scrapping, My Artsy Friends!

Sunday, February 8, 2015

Pinspiration: Zoo Day

Time for another Pinspiration! For this layout, I tackled two techniques at one time! I used Pinterest to create the layout on the left page. AND, I was diligent in stash busting and used some paper I had left over from my son's baby album. So, while all of the cardstock and most of the embellishments are CTMH, the B&T paper is Paper Studio from Hobby Lobby.


I absolutely love the way the original design combines brightly colored B&Ts to make a bold statement. I chose to use a more earth-toned color palette to appropriately match the zoo theme.


For the cluster embellishment, I got a little creative, and used scraps from the paper itself, using three circle punches and some fussy cutting. The title was cut using the Cricut Artbooking cartridge, and I wielded it together in Cricut Craftroom. The other embellishments are all retired CTMH.


For the right page, I used the same mat design from the left page, and created my own layout for my remaining four photos. I wanted to mirror the layered design from the left page, as well.


To embellish this page, I used a 2in circle punch to tuck behind the film strip.


All and all, I think this layout is very fun and whimsical, much like the zoo carousel we rode that day! Plus, it was a great opportunity to use some paper and embellishments I have had for a few years by mixing them with some CTMH cardstock. 

Happy Scrapping, My Artsy Friends!

Thursday, February 5, 2015

Tri-fold Card: Home is Where the Heart Is

Whenever I hear the expression "Home is Where the Heart Is", I immediately think of family. I come from a fairly large family, and married into a HUGE family! As a Coast Guard wife, I don't get to see family as often as I would like, so I am constantly sending cards to show my love. Since, the first challenge for Heart 2 Heart this month is to interpret Home is Where the Heart is, I took the opportunity to create a family centered Tri-fold card.

Tri-fold cards create the illusion of a normal card upon receipt, but open up to reveal several panels that help the card stand up for display. 


I had a great deal of difficulty finding a really good tutorial for this card, so I am going to do my best to walk you through it.

  1. The Cardstock Base is cut to 5.5 x 12in.
  2. Using a scoreboard, score at 2, 4, 8, and 10 inches.
  3. Using your paper trimmer, cut at 1.5 and 4 inches from scoreline to scoreline.
  4. Fold back and forth several time to create a good crease. Your final folds should be mountain/ valley style.
  5. B&T paper is cut as follows:
                     *1.75 x 5.25in (cut 2)
                     *1.25 x 1.75in (cut 4)
                     *2.25 x 1.75in (cut 2)
                     *1.25 x 3.75in (cut 2)
                     *2.25 x 3.75in (cut 1)

For mine, I used the retired Skylark paper. This paper has some writing on it that I wanted to feature in my card. It was sort of a paper waster to cut out the words and phrases, but I really liked what they said.

My final embellishments was stamping using several retired stamp sets. I kept the whole thing relatively flat, because these cards would be mailed. But, the stamping still creates a big impact.


For more information about Heart 2 Heart Challenges, click here.

Happy Scrapping, My Artsy Friends!

Wednesday, February 4, 2015

Pinspiration: Down on the Farm

Welcome to another post in my Pinspirations blog series. I am relatively new to Pinterest. I mostly use Pinterest to post artwork from this blog, but I wanted to try creating artwork inspired by other's pins. For this post, I completed a spread using a sketch I found on Pinterest. You can view the original sketch, and others I have pinned on my Scrapbook Sketches Board.


I really like this sketch, because it has space for a lot of photos, and it has a busy element that can mimic the fun of the farm. To create this spread, I used the retired Jubilee paper pack, which has the perfect farm and country theme.


Instead of being too stamp heavy on this spread, I used the B&T of the paper to embellish, as you can see with the cow I cut from one of the sheets.


On the right page, I not only used the B&T to embellish, I cut an adorable horse using the B is for Boy Cricut Cartridge. The horse was actually a rocking horse, but I cut the rocking part off.


Happy Scrapping, My Artsy Friends!